Opening up old Gameboys
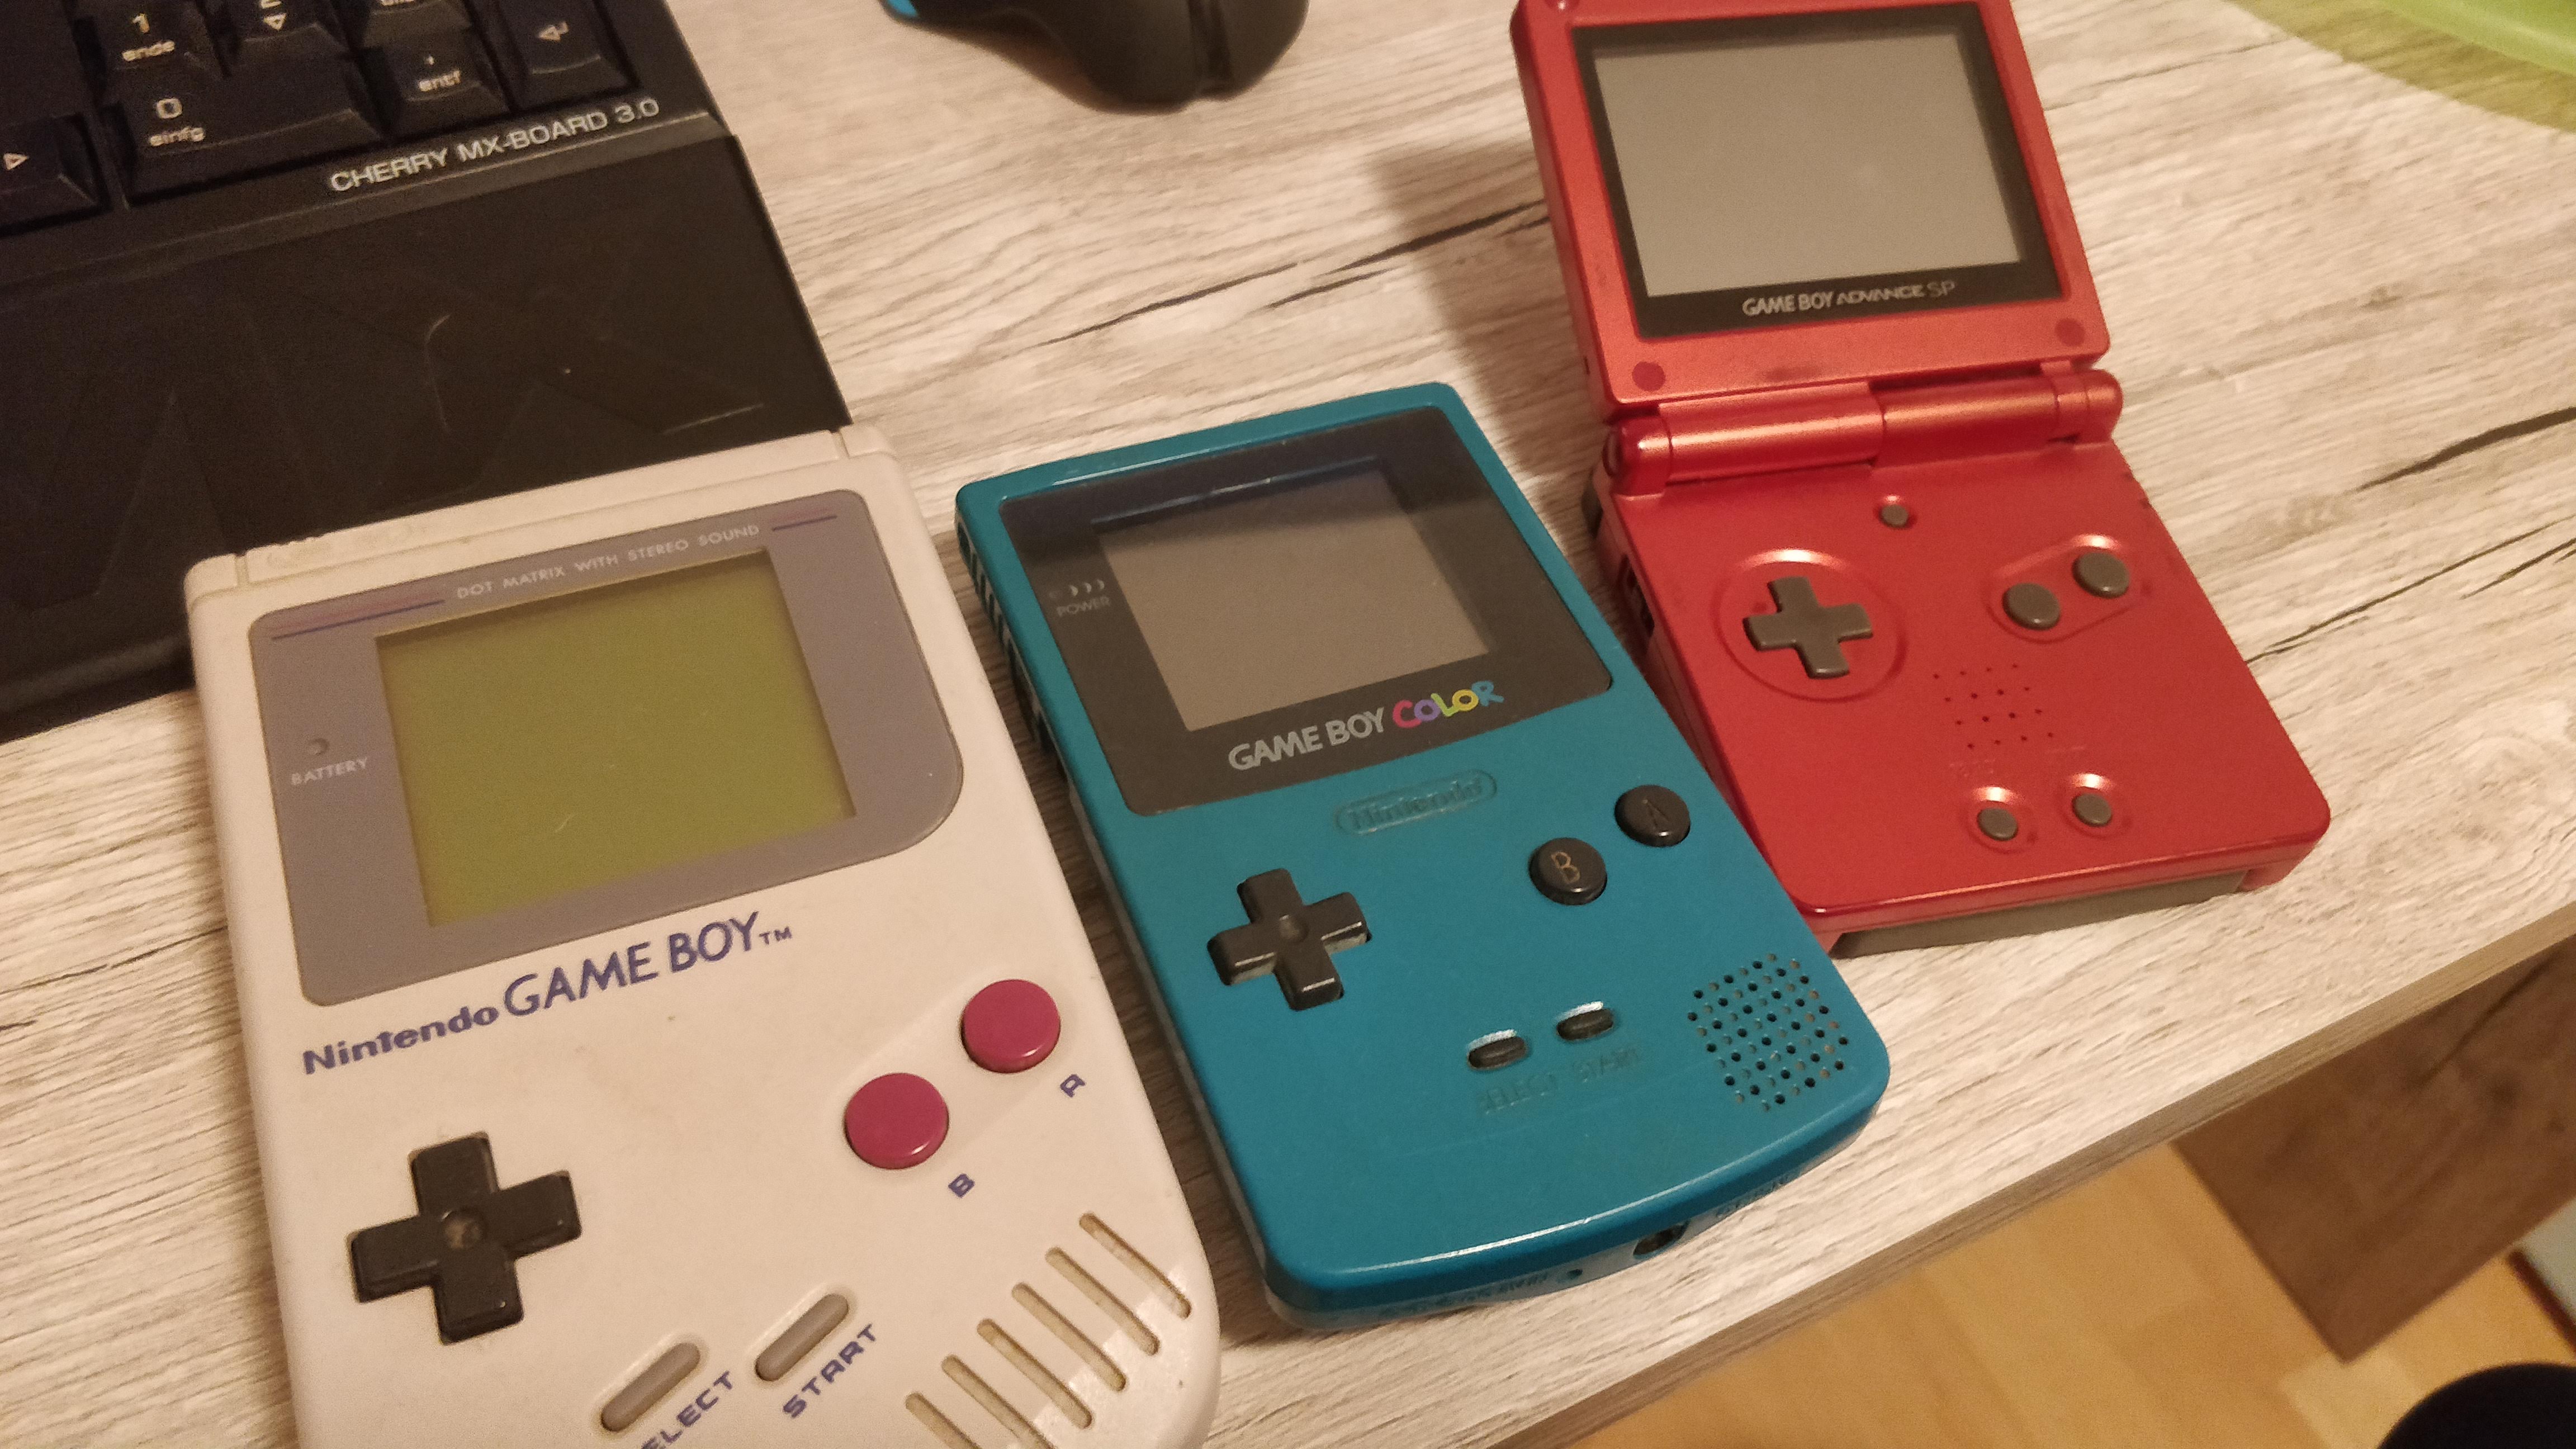
I had visited my parents over Christmas and my mother gave me our old Gameboys! The Gameboy Classic, Gameboy Color and the Gameboy Advance SP are still in our collection. We also used to have a purple Gameboy Advance, but we have no clue where it ended up at. Together with about 25 games, I brought them home.
After playing some of the games again (it did feel classy playing Tetris on the old Gameboy) – I realized it’s not something I will do often. Especially the two without backlit displays are just plain annoying in 2021.
Having looked at eBay before, I knew that they could amount to over 150€! While being excited about that, most eBay listings included Gameboys in better shape (well, they weren’t as dirty as mine). In order to get the most out of them, I looked up and followed some videos on how to perform a deep clean on ‘em.
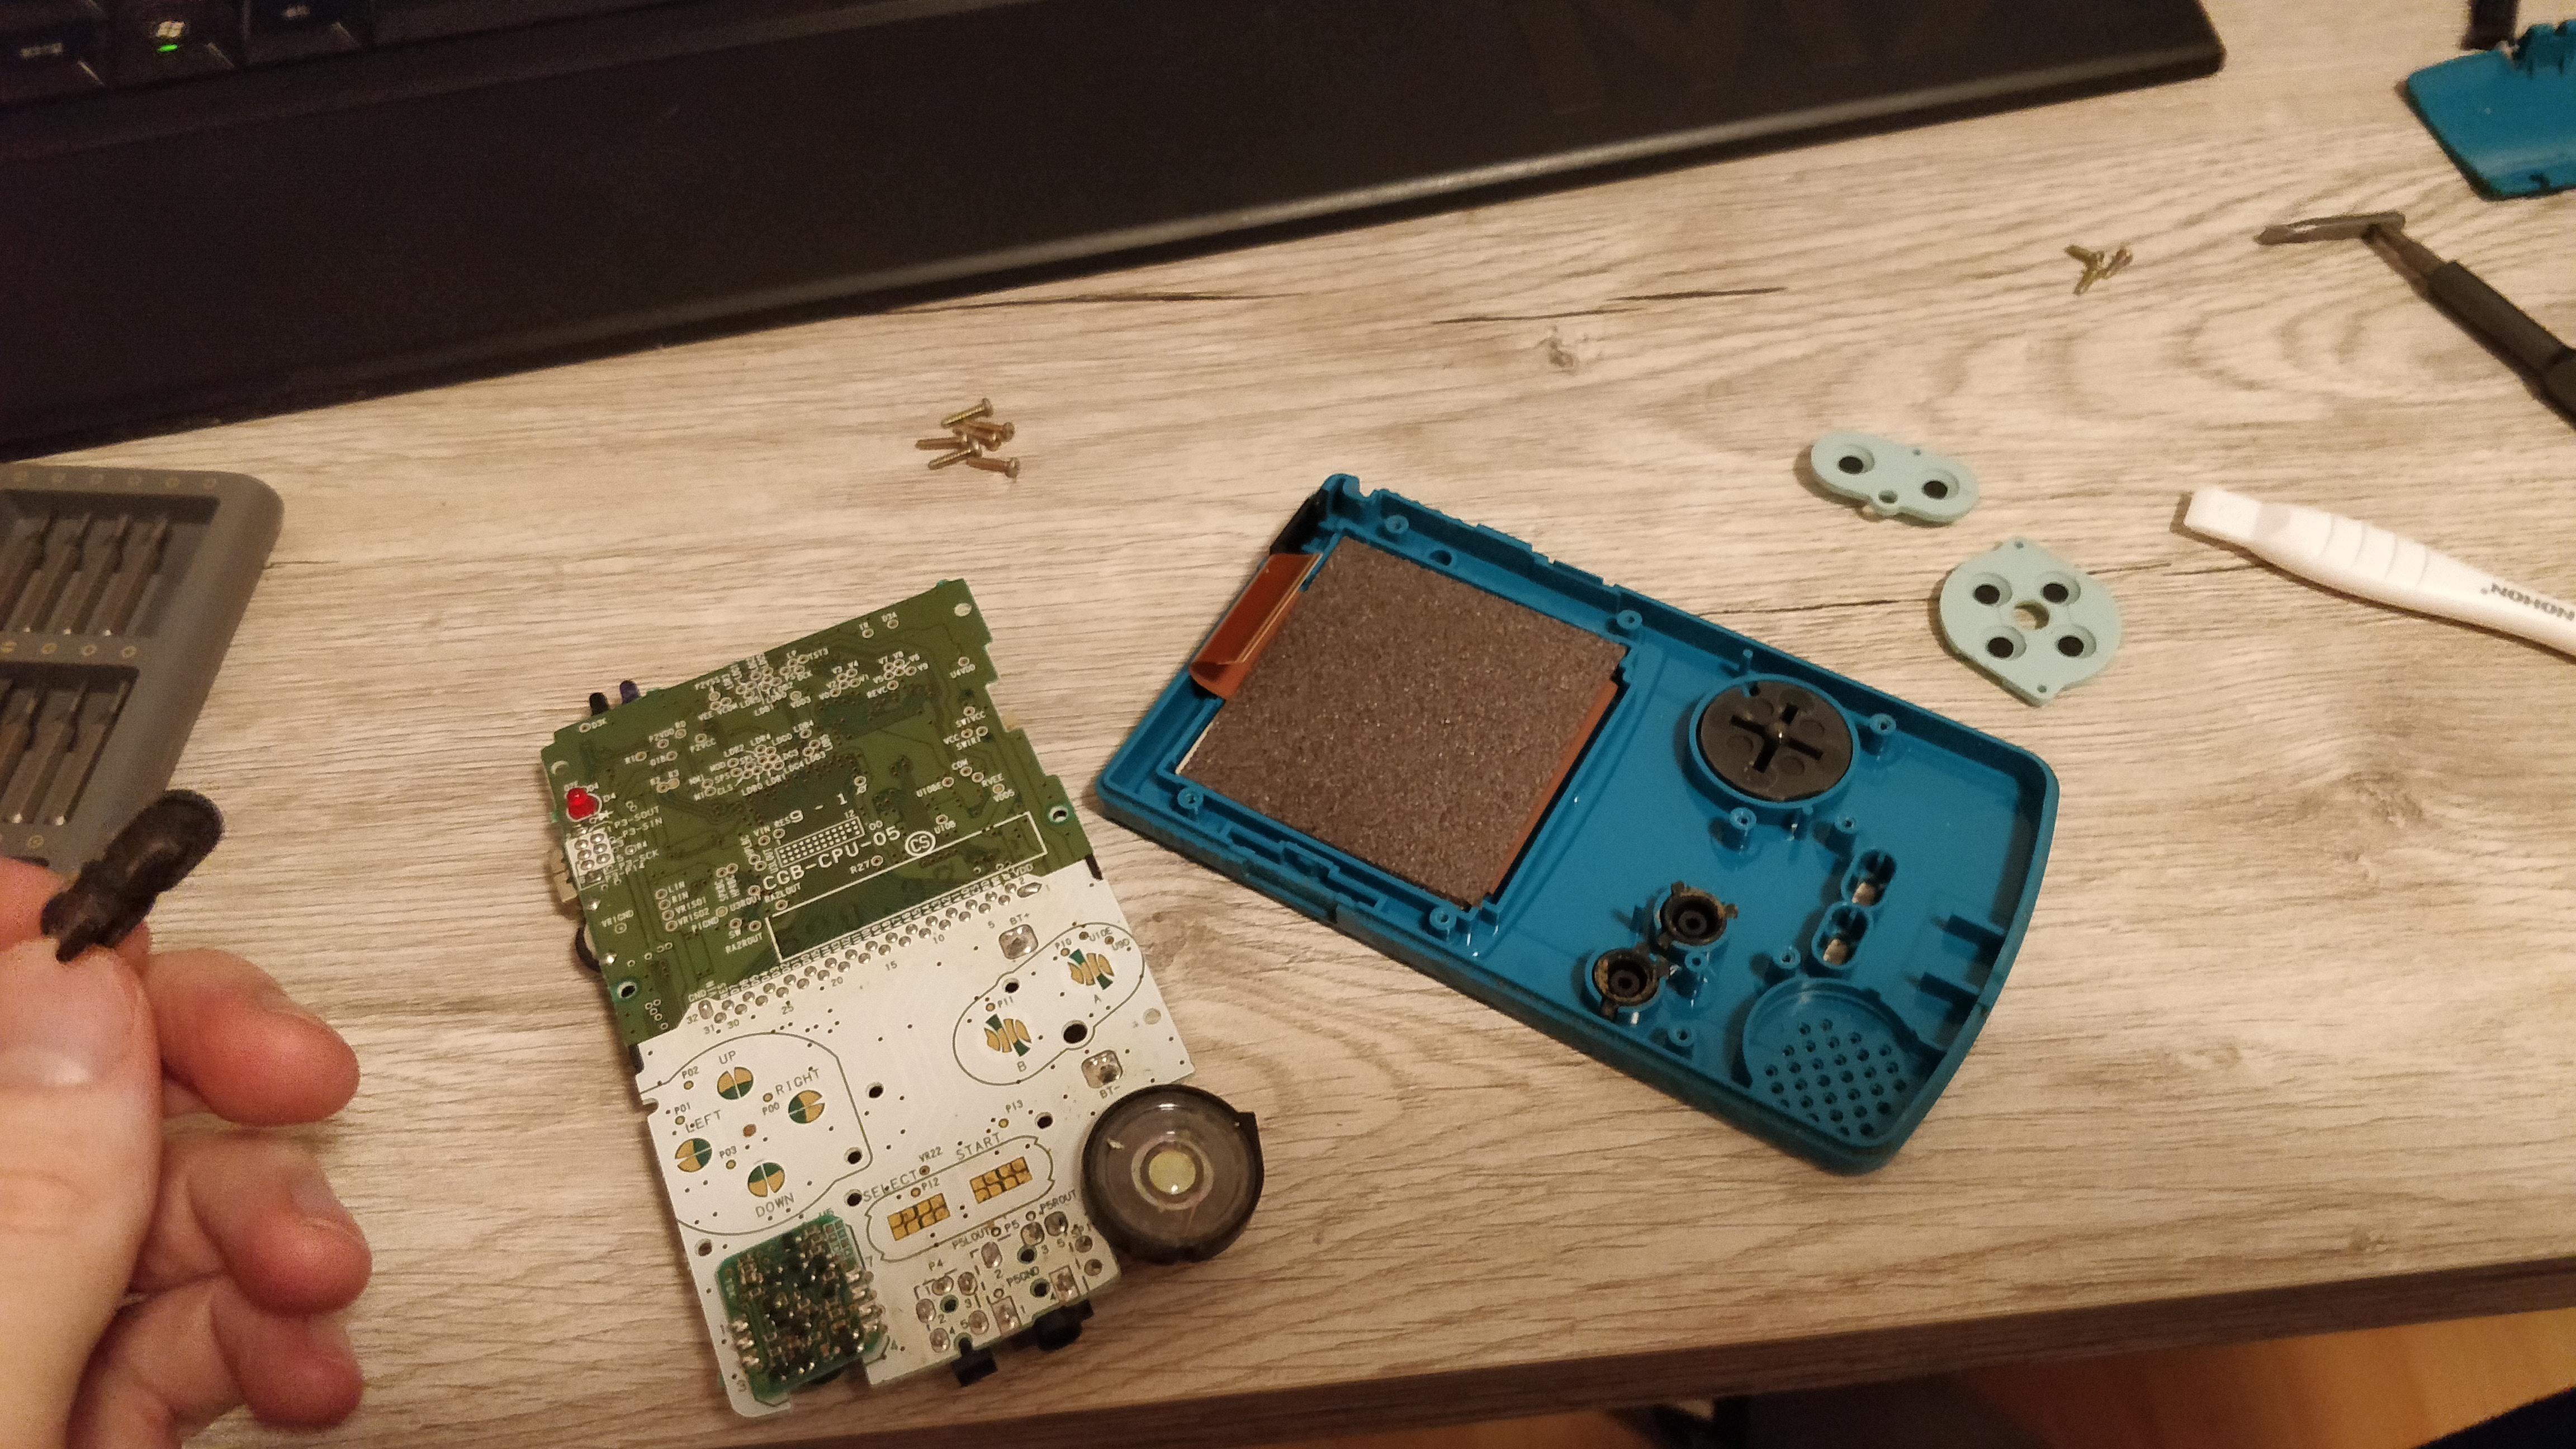
Here are two main parts of the Gameboy Color: At the left there’s the motherboard, at the right there’s the front cover with the display attached to it. See this exploded view to see further parts.
Taking the Gameboys apart was an easy job, the only prerequisite needed were Y1, PH1 and PH0 screwdrivers, which are included in the excellent Xiaomi Wija Screwdriver set.
I’m no expert by any means in opening, cleaning or repairing devices, but these did surprise me a lot on how straight forward everything was. Even a 12 year old kid can accomplish this! Pretty exciting, in my opinion.
Maybe it can be explained due to Nintendo having produced over 118 million devices. I’m sure they paid a lot of attention to make sure repair shops around the globe could repair them easily. Also, back then (1990 and 1998) devices just couldn’t be produced in a very slim way and customers didn’t expect 300 different features, I guess?
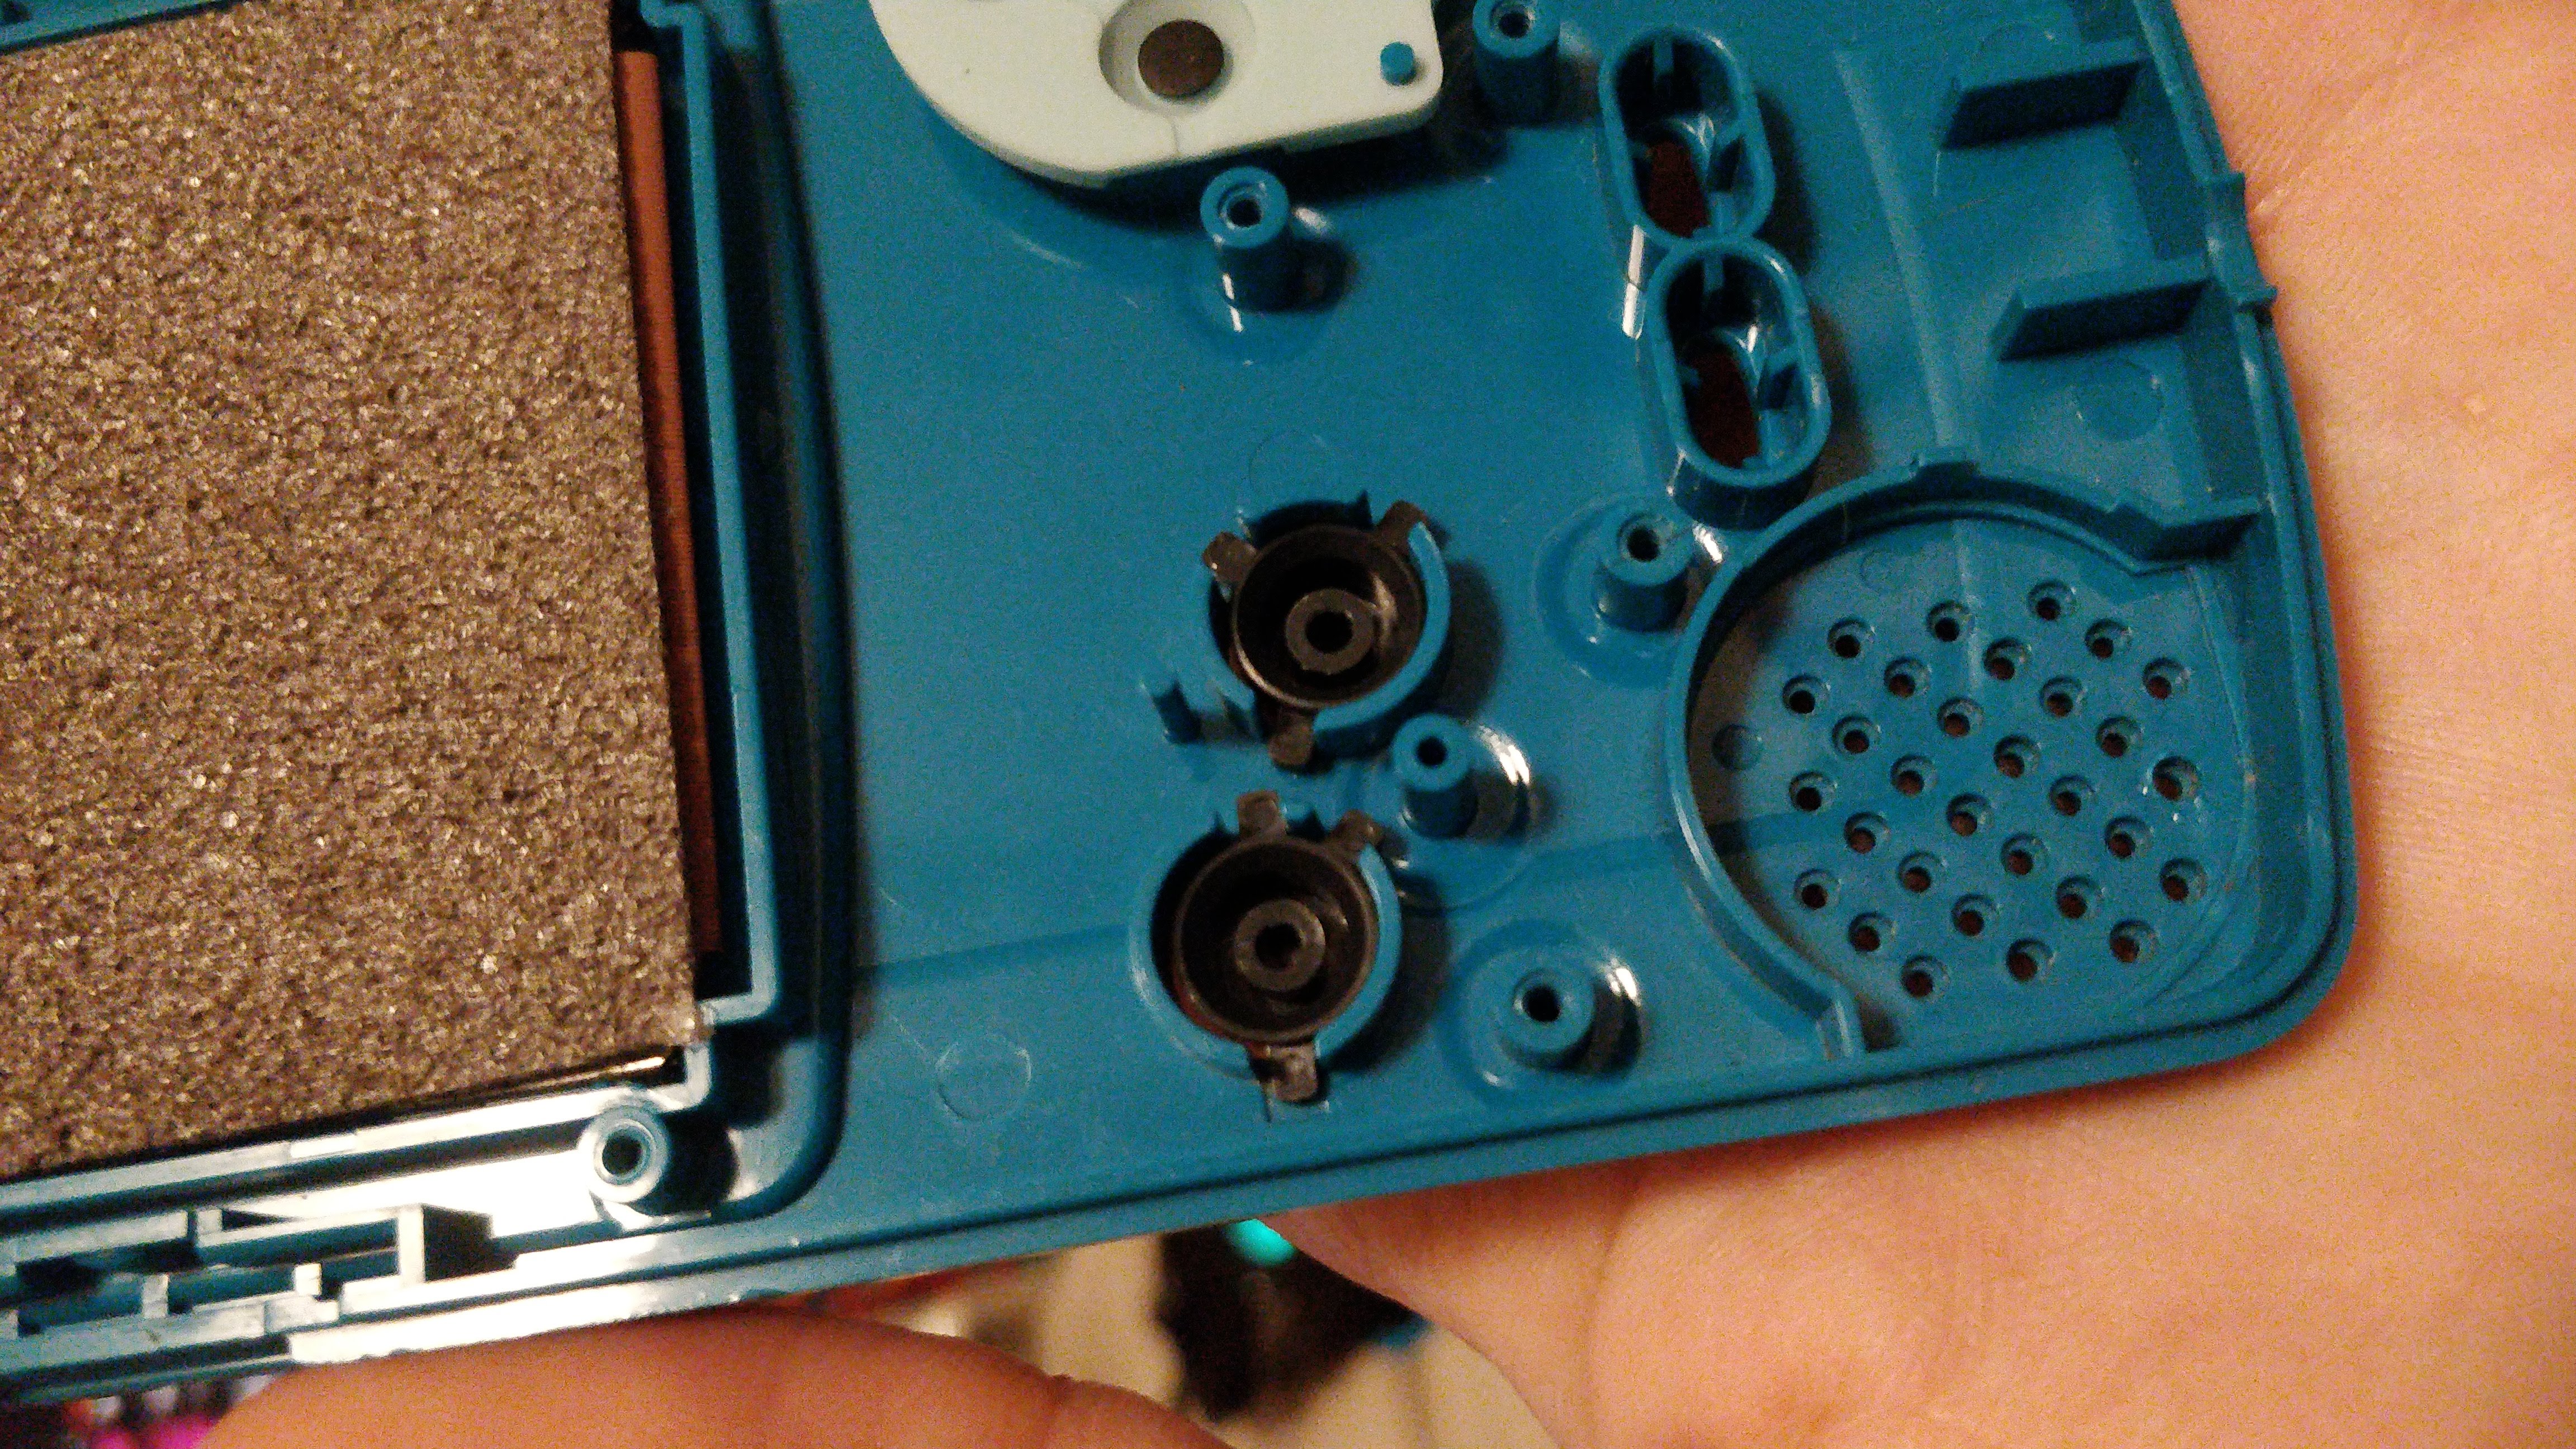
To highlight why I really like the design and the repairability of the Gameboys, here’s the front cover with the A and B buttons being placed in. I was first wondering whether A or B had to be on the left side (it’s not written on the case), but the buttons don’t even fit in the wrong place! Other pieces like the D-Pad or the battery connectors also have small tips/corners which make them impossible to fit in the wrong way. That’s it! Let’s hope I’ll get some good money for them :D.